
To start out, you do need to indulge yourself in a wonderful, hot cup-o-joe or hot tea from your local coffee shop (maybe Starbucks). Why you ask? You need the cardboard cozie that is around your cup for the template/pattern! Silly people! ;-) hehehe
After you make one or two or three.....of these, you won't need to have an ugly cardboard cup from your fave coffee shop ever again!
Materials
3 - 1/4 yards of coordinating fabric
(fat quarters work wonderfully)
or
1/2 yard of the same fabric
1/4 yard very thin natural batting
button
(**a shank button works best, but if you just wanna use what you have
- like me - a regular button is fine**)
elastic ponytail holder without the metal piece
scissors
sewing machine
coordinating thread (unless you are me and kinda lazy about changing out thread)
I don't have a picture of this step but you are all highly intelligent and can do this without a visual! ;-)
I altered my pattern slightly, so I don't use the paper jacket as my pattern now.
open up that ugly paper coffee cup "jacket" that you saved from your last cup-o-joe at the seam
*don't cut it or it will be too short, just carefully open it up to lie flat*
now you trace it onto your fabric
*make sure to do your tracing on the "wrong" side of your fabric*

I used three contrasting fabrics for one cozie, but you don't have to.
cut it out
*I took a short cut so I didn't have to trace twice, I pinned my corrdinating fabric together before cutting it*

for the ruffle, you need a 2 inch wide strip of fabric that is a minimum of 36 inches long
**Disclaimers**
if you bought fabric or had fabric by the yard on hand this is simple, just cut a strip and trim it to 36inches
if you are using fat quarters, you will need to cut two strips and sew them together and then trim evenly on each side to make it 36 inches long

**if you don't want a ruffle, skip that last step**
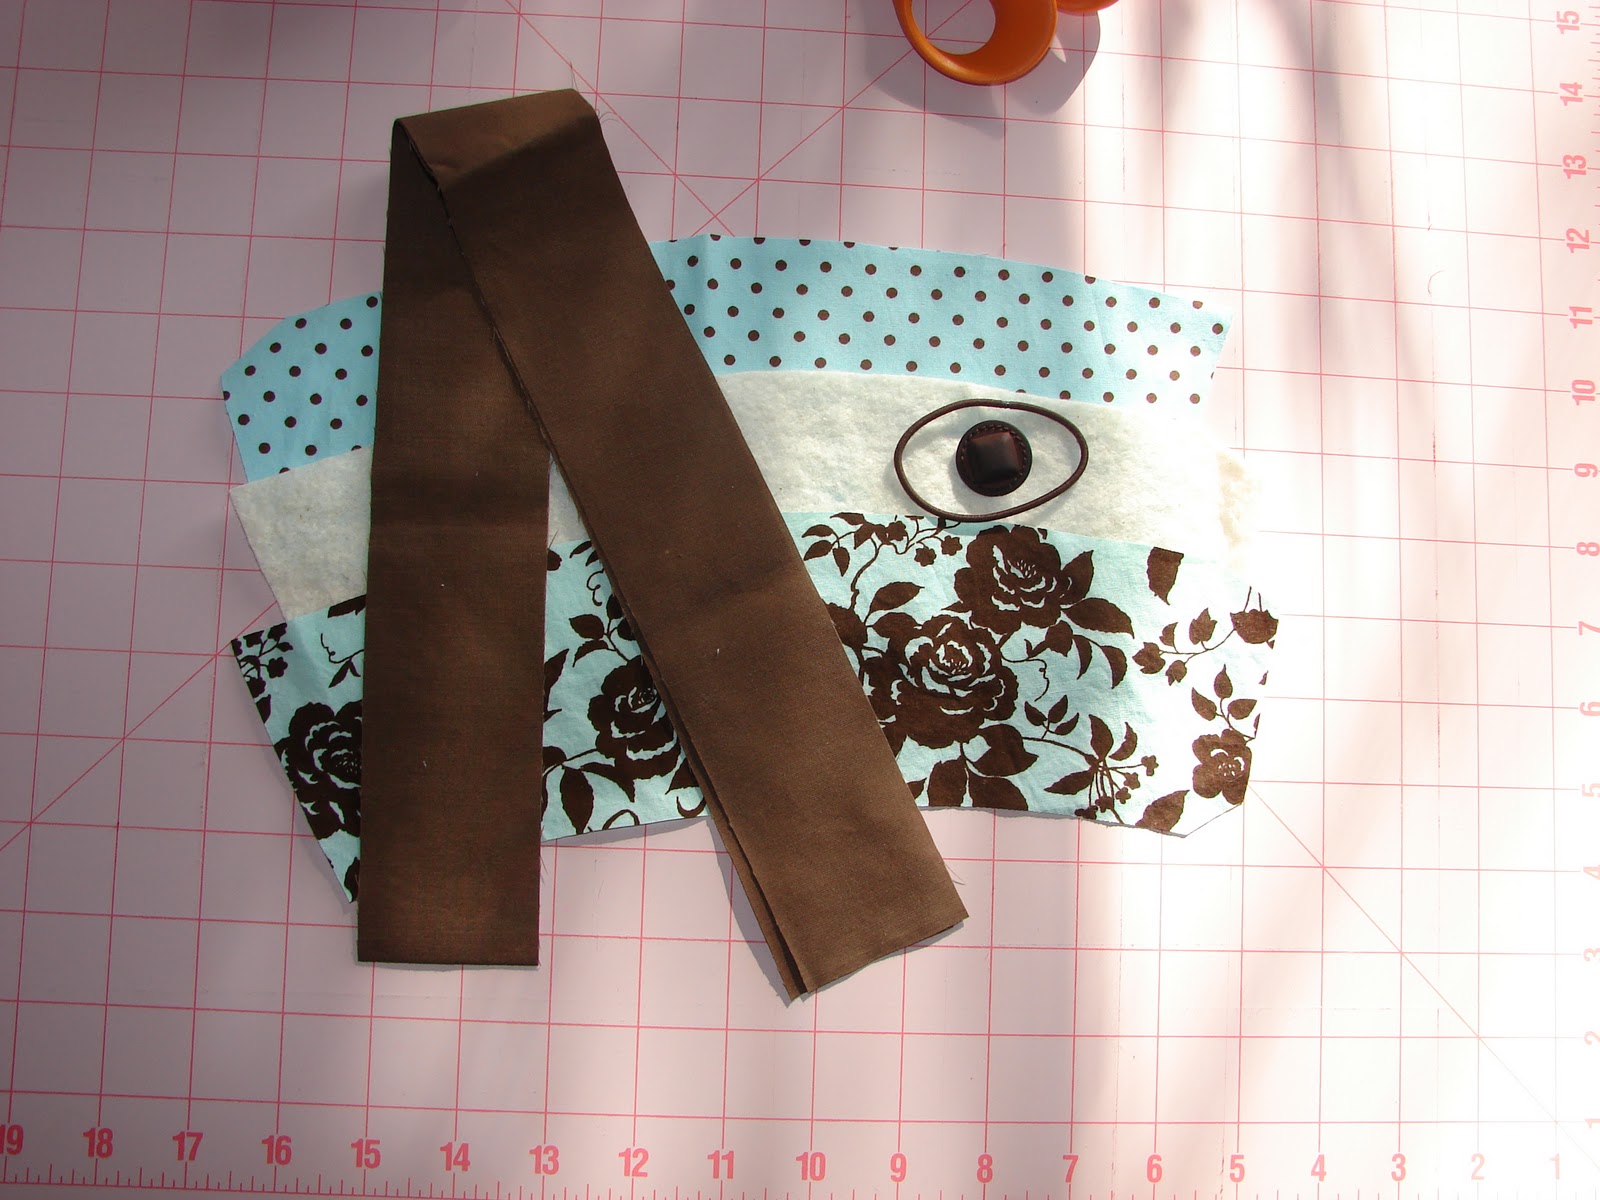
now pin one of the cozie pieces to your batting and cut out

these are all of the pieces you need to sew together
Let's Get Sewing!!!
First things first...
make the ruffle
this is pretty simple...
take the 36" strip of 2" wide fabric, fold in half and sew up the ends 1/4" seam
**if you are making your 36" piece sew the two pieces together first and press the seem open**

clip your corners very close and trim seams back
this helps to turn the strip so you have nice crisp corners
now, sew the long edges (selvedge) together wrong sides together with the longest stitch your machine has
**called a basting stitch**

Voila! you have the start of your ruffle.
Set this aside we will work with it in a bit.
take the batting and ONE of the cozy pieces you have and baste together so the batting does not shift
**follow the edge of the presser foot and the fabric to make it a small seam**
now we will need that ruffle piece again
take ONE of the lengths of thread from the stitching and pull it carefully making it ruffle
(Good greif, I didn't get a pic of this either - need a pic, just let me know)
you have that done, now it is time to attach it to the other cozie piece
**we will be leaving one of the short edges WITHOUT the ruffle**
start pinning the ruffle onto the cozie piece at one end (be sure to leave about a 1/4" before the ruffle so that you can turn it under and close up the seam at the end, making sure that you are matching the selvedge edges
(in other words the fold of the ruffle should be away from the outer edge - just check out the picture)
you may have to lenthen your piece to fit all the way down both long sides and the one short side
**Disclaimer**
I will warn you now, the corners are a pain in in the arse to go around! I have yet to get them perfect - or at least the way I want them to look, which is perfect. You will just have to practice, practice, practice!

(this particular ruffle is slightly different than what you will have, I decided to try something a little bit different)
once you have the ruffle pinned on, you can baste stitch it in place and add the elastic pony tail holder at the same time (oops, forgot to take a pic of the elastic)
**I like mine to barely show out from under the ruffle when it is turned, but you can make it as large or small as you want.**
pin right sides together of both cozie pieces and sew a 1/4 to 1/2 inch seam, leaving one short end open so that you can turn the cozy
trim the two corners close and trim back the seams


I don't trim off the excess of the elastic holder, but that is just my preference. You can do whatever your ginormous heart desires with that.
now turn...


**make sure you poke out your corners to make them crisp**
One of mine is nice and crisp, the other didn't work out quite as nicely.
Hence the reason I keep making these this month, eventually I will get it "perfect".
after it is turned
1) turn under the open end 1/4" and press
1) turn under the open end 1/4" and press
2) slip stitch closed
or if you just want to get it done fast (like me)...
1) turn it under and stitch it at the same time saving the pressing for last

second to last thing is deciding on where you would like to place your button
ok...you got your spot picked out?
sew that baby on!


Finally...
Enjoy a lovely cup-o-joe or tea (whichever your preference)
and tell people that love your decor for your cup
that you didn't buy it...YOU made it!
(Unnfortunately I ran out of time before I went to work today to finish up the teal and brown one. Lucky for me, I had pictures of some of the others I've made.)
(Unnfortunately I ran out of time before I went to work today to finish up the teal and brown one. Lucky for me, I had pictures of some of the others I've made.)
As with anything I post, if you have questions or something isn't quite clear, please ask. I am always happy to make clarifications on anything that is questionable!
warm{dot}bouquet{at}gmail{dot}com
Have a very creative day!
Hugs,
Beth
3 comments:
That teal/brown is my favorite!! I love the pleating--bee-you-ti-ful!!
these are "sew" cute.
muah ha ha ha
Very cute!
I'm following from the blog hop.
I'd love a follow back at www.mikaspantry.blogspot.com
Thanks,
Mika
Post a Comment